Integration with personal Toggl timer
Toggl Button is a Chrome browser extension that lets you track time from various online apps. Fortunately, Targetprocess is among them!
Integration with Toggl consists of two parts:
- Installing the Toggl plugin to the web browser. As a result special start / stop timer button appears in detailed views of your Targetprocess entities. Recorded time is posted to your Toggl account.
- Set up a Zapier zap to post time submitted to Toggl to Targetprocess automatically.
Sign up with Zapier is required
You will need to sign up with Zapier service to use this integration. The setup includes 3 steps on Zapier side, therefore For Work pricing plan is required.
The guide describes setup for a single user. You should create separate Zap in your Zapier account and repeat steps 1...4 for each Targetprocess user who submits time via Toggl.
Step 1: Install the Toggl button
Install the Toggl button using the Chrome web store.
Detailed instructions are available at support.toggl.com.
Allow access to your Targetprocess account under the Permissions tab. Add Custom Domain Url Permission for your Targetprocess domain.
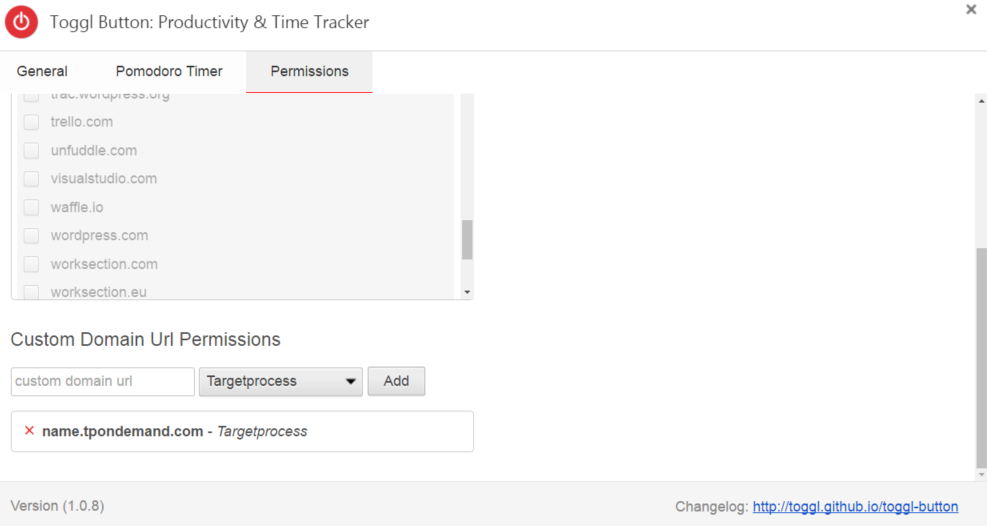
Afterwards log in into Toggl account in your Chrome web browser. Login button is shown in the menu of Chrome extensions.
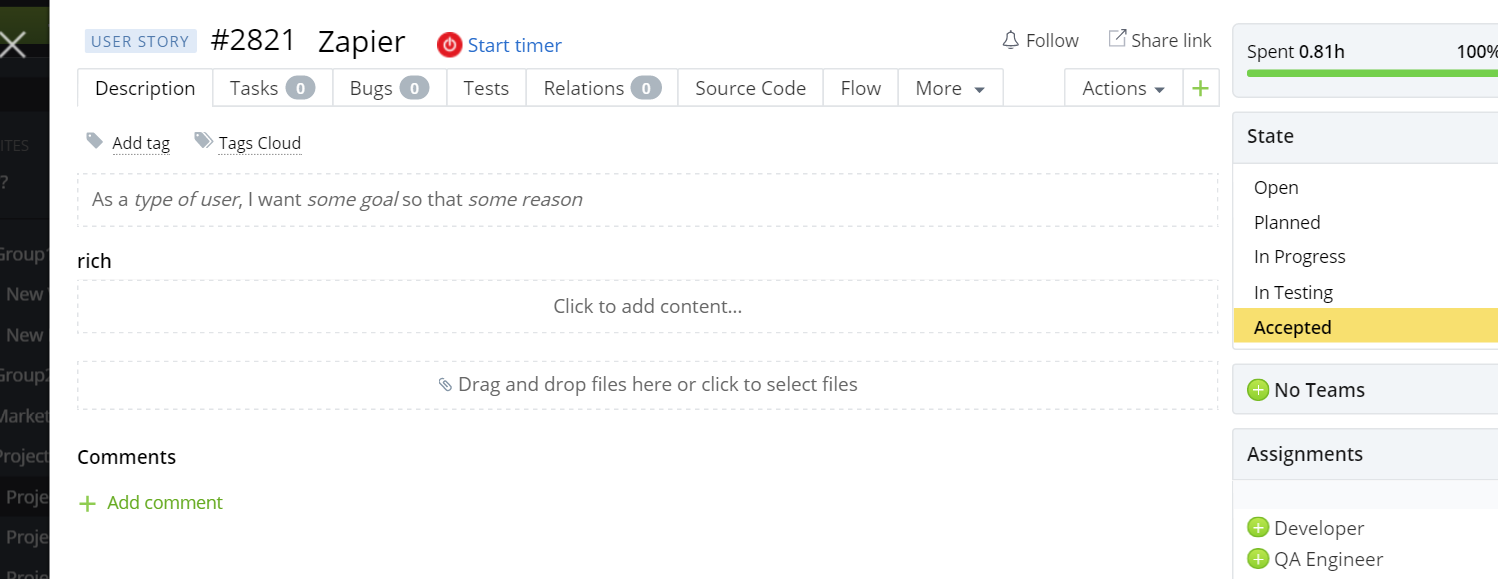
Once completed, the Toggl button appears next to the Entity name in Targetprocess:
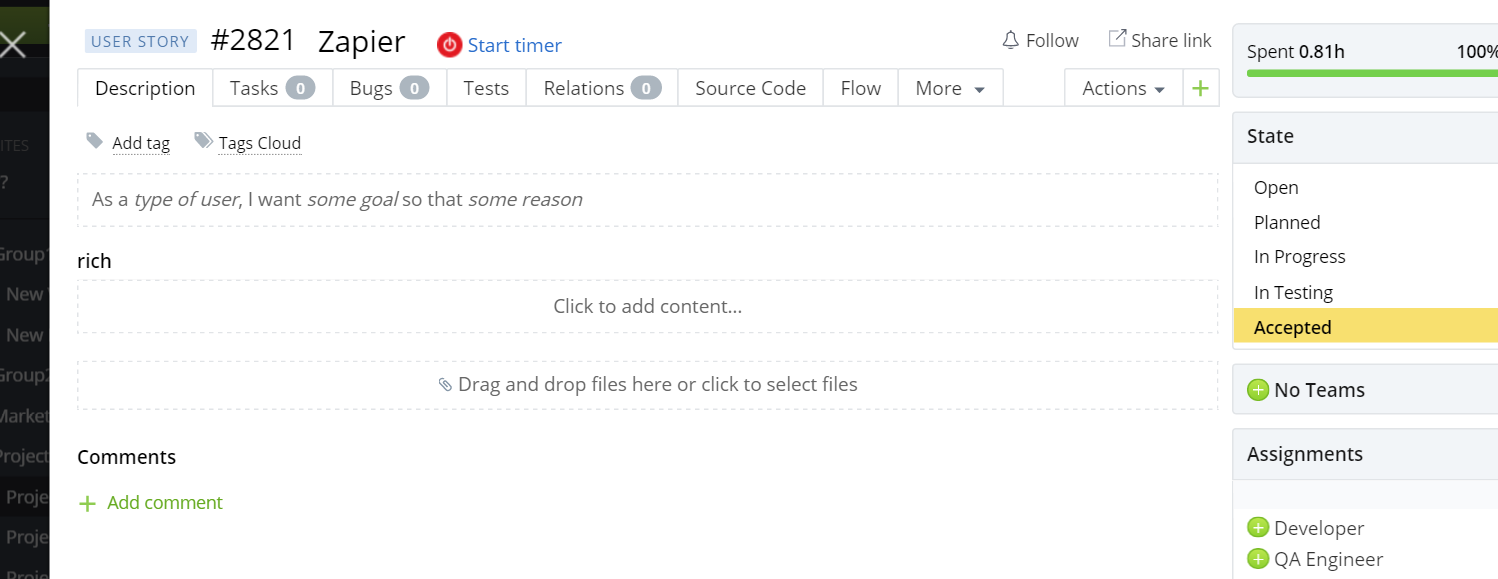
Press the button once - and it starts the Timer. Press it again - and the timer stops, sending the time record to your Toggl account.
Now we're ready to forward time records from Toggl to Targetprocess using Zapier!
Step 2: Set up Toggl Trigger in Zapier
Log in to your Zapier account.
Create new Zap. Select Toggl as a Trigger App:
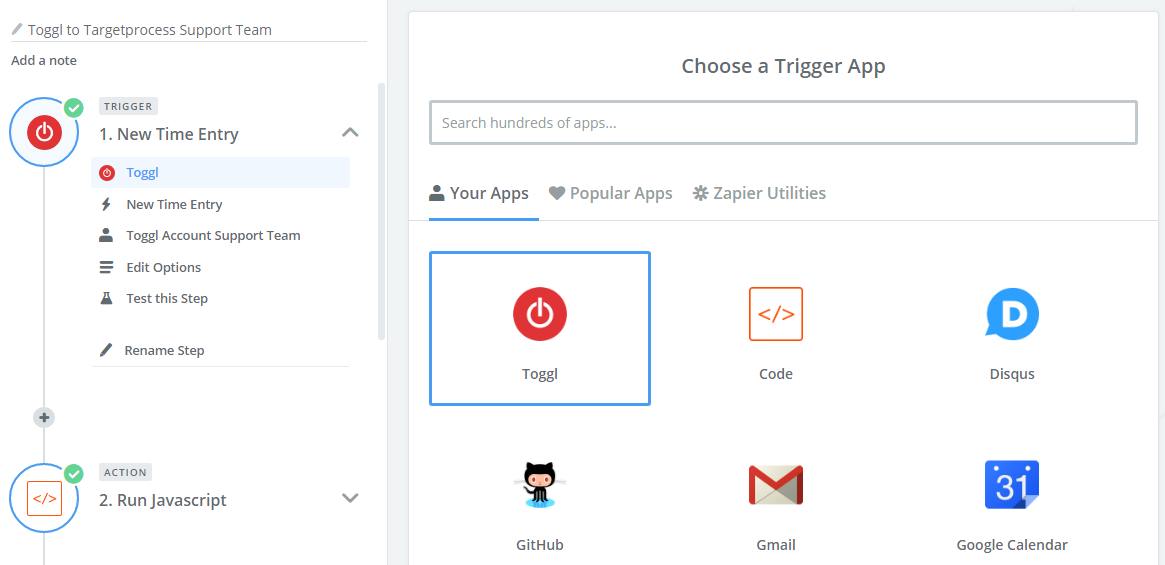
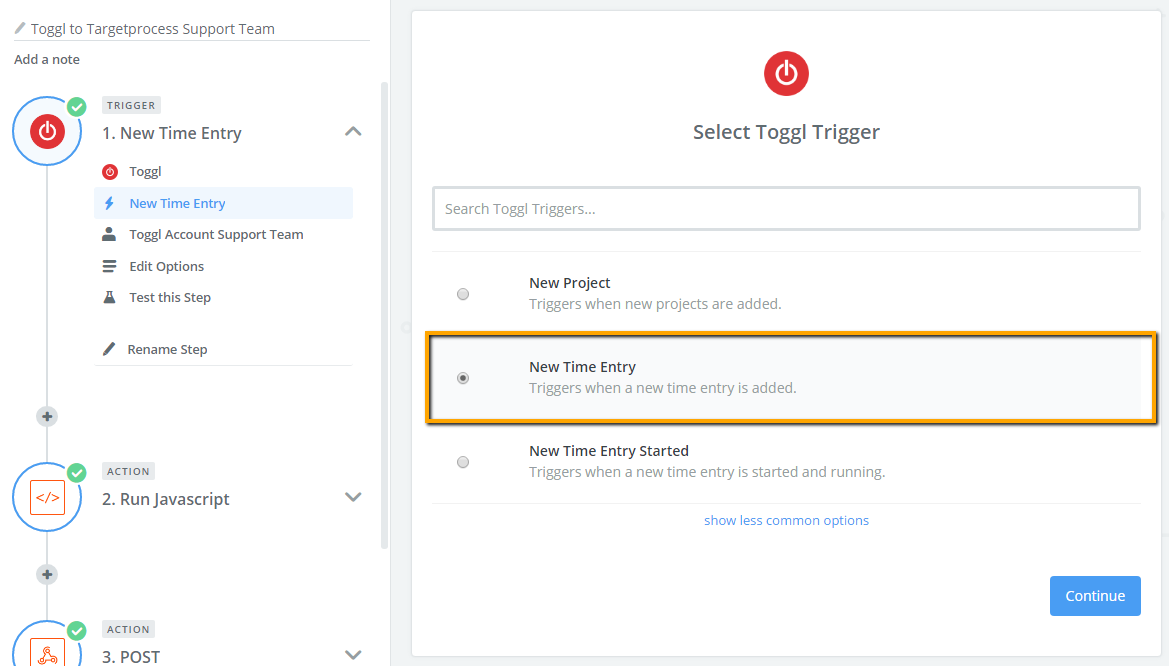
Select "New Time Entry" for the Toggl trigger:
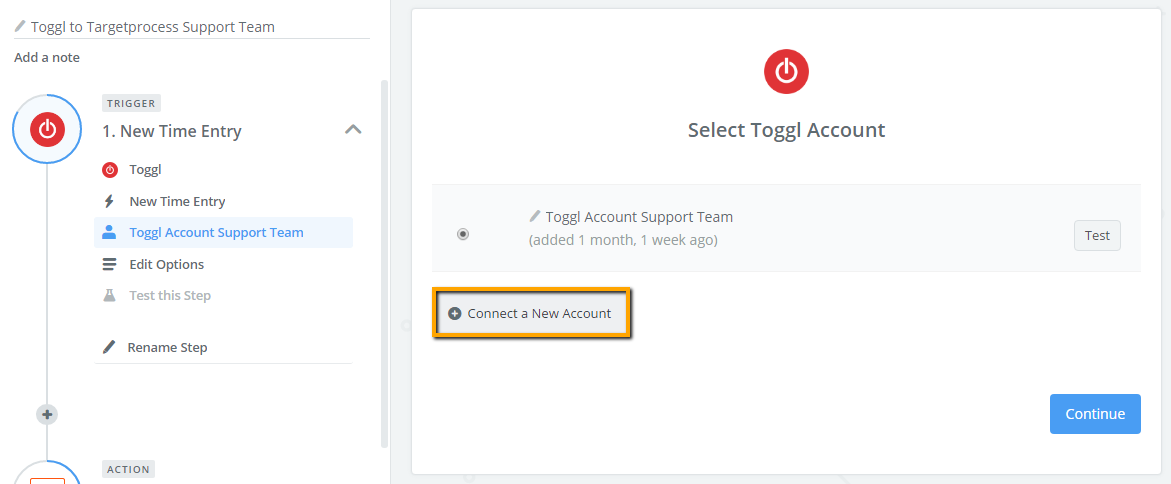
Connect your Toggl account to Toggl trigger. Create a New account in Zapier if details of your Toggl account are not there yet.
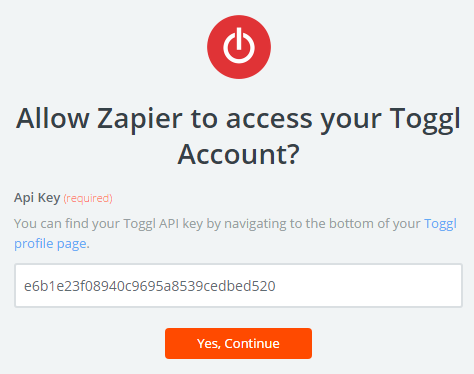
Grab your Toggl API token from Toggl account details > "My Profile" section. Connect your Toggl account to Toggl trigger in Zapier using the token.
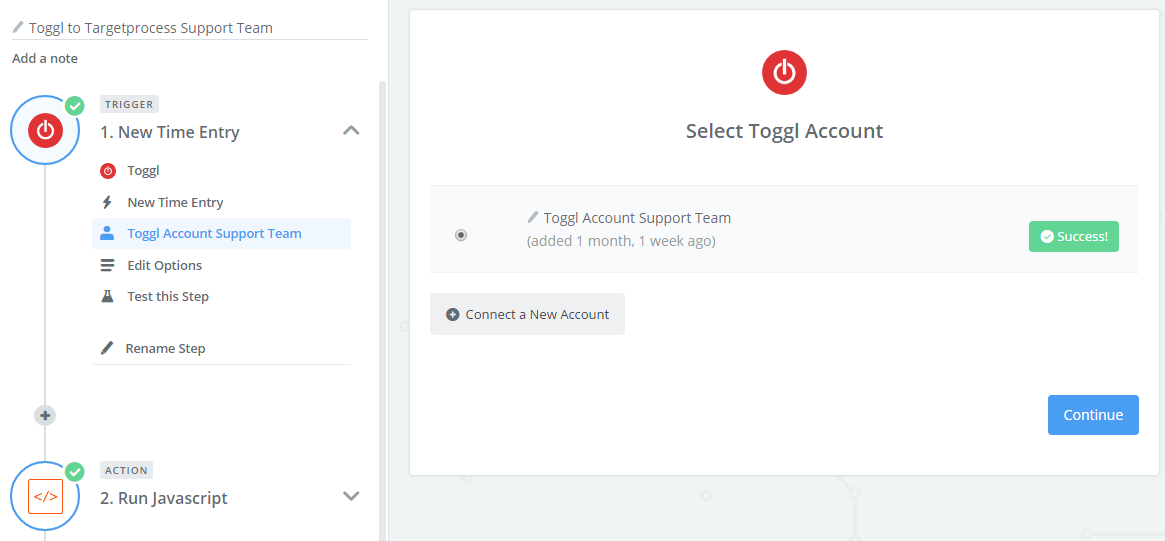
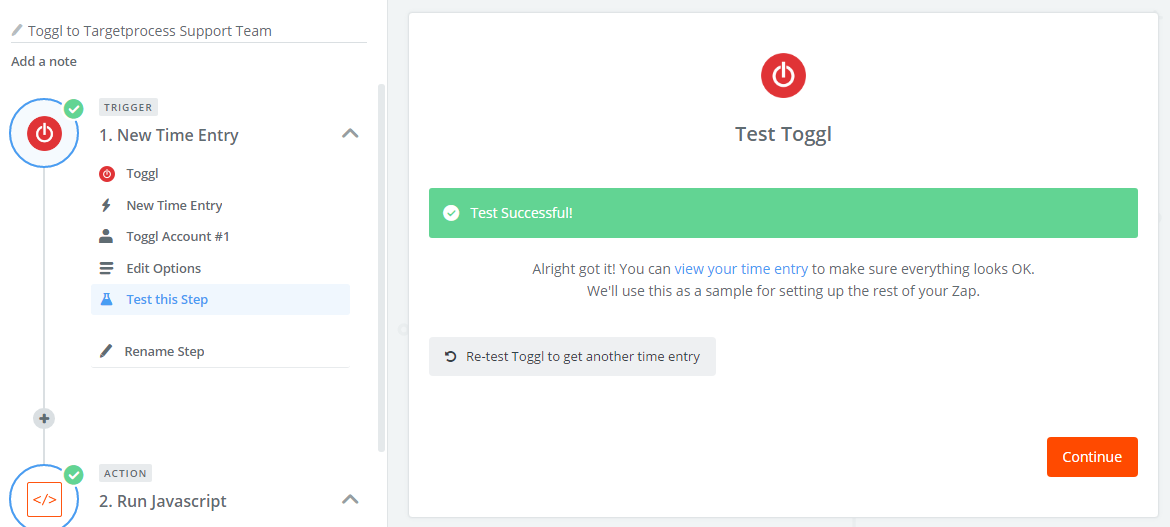
Test connection.
To test the whole step please submit a new time entry in Toggl and then perform a test in Zapier.
Step 3 (optional) setup 'Filter by' in Zapier.
If you use toggl outside of Target Process, then Zapier will receive an error every time a non target process related time entry is created, a quick way to reduce these errors is to add a "Filter By" step in Zapier which prevents the Zap from continuing unless the Toggl entry 'Description' starts with '#' (see image below).
Step 4: Pull Entity ID and Time Remain using Code Action
Add new Action. Select "Code by Zapier" as an Action App:
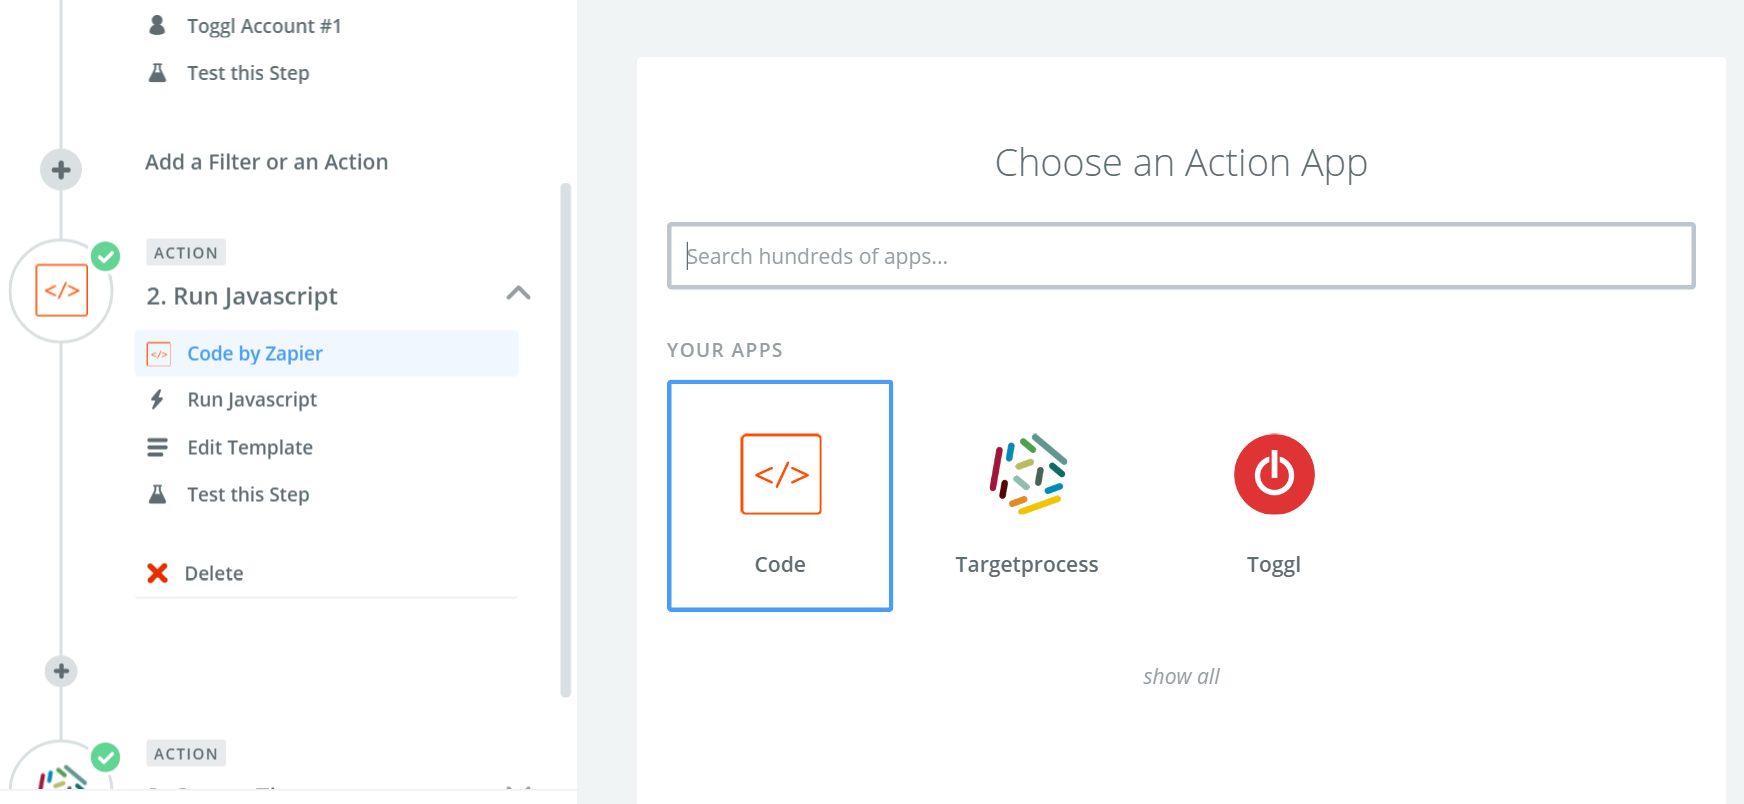
Choose Run Javascript for the "Code by Zapier" action
Edit Template:
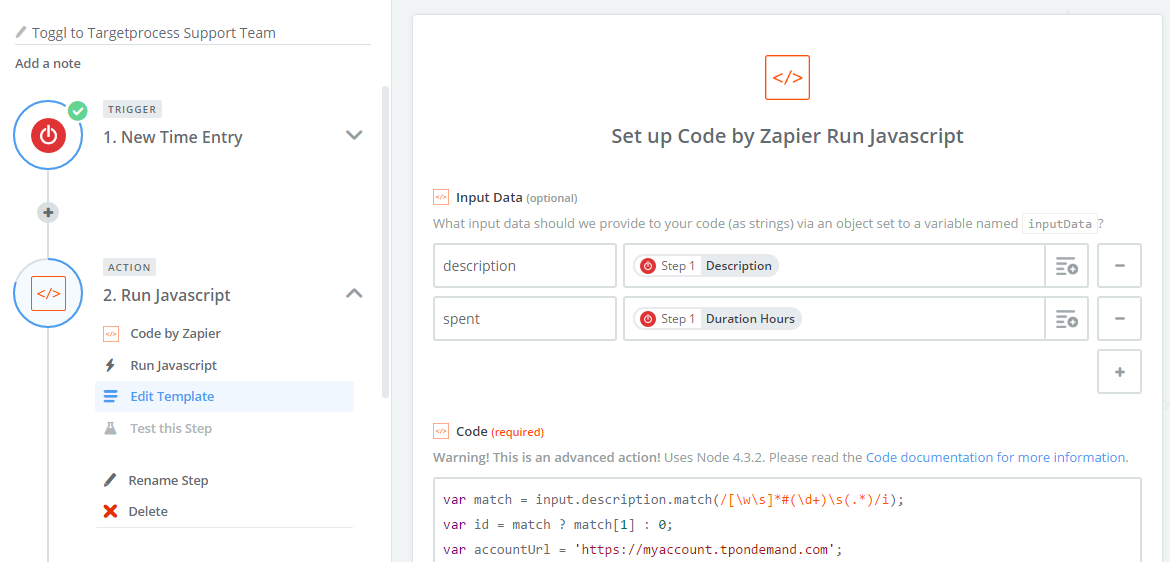
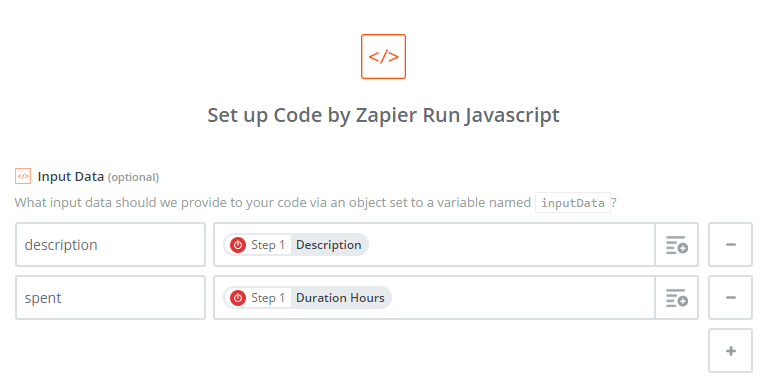
Edit the Input data as shown in the screenshot below:
| description | Step 1 Description |
| spent | Step 1 Duration Hours |
Copy and paste the following Code. Replace accountUrl and access_token values with your personal ones.
Access Token is generated under My Profile > Access Tokens tab in your Targetprocess account.
var match = input.description.match(/[\w\s]*#(\d+)\s(.*)/i);
var id = match ? match[1] : 0;
var accountUrl = 'https://myaccount.tpondemand.com';
var access_token = 'MjkwMDI6c1RHczJaUWsrRWpKZkpEUWlNeXFibjdkajM2M3ppY2ZIaWhIS0owUEVDMD9=';
var url = accountUrl + '/api/v1/assignables/' + id + '?access_token=' + access_token + '&include=[TimeRemain,RoleEfforts]&format=json';

fetch(url)
  .then(function(res) {
    return res.json();
  })
  .then(function(json) {
    var newRemain = 0;
    var roleEffortsCount = Object.keys(json.RoleEfforts.Items).length;
    if (roleEffortsCount == 1) {
      newRemain = json.TimeRemain - input.spent;
      if (newRemain < 0) {
        newRemain = 0;
      }
    }
    var output = { id: id, remain: newRemain };
    callback(null, output);
  })
  .catch(callback);
return { id: id, remain : 0 };
Test this step.
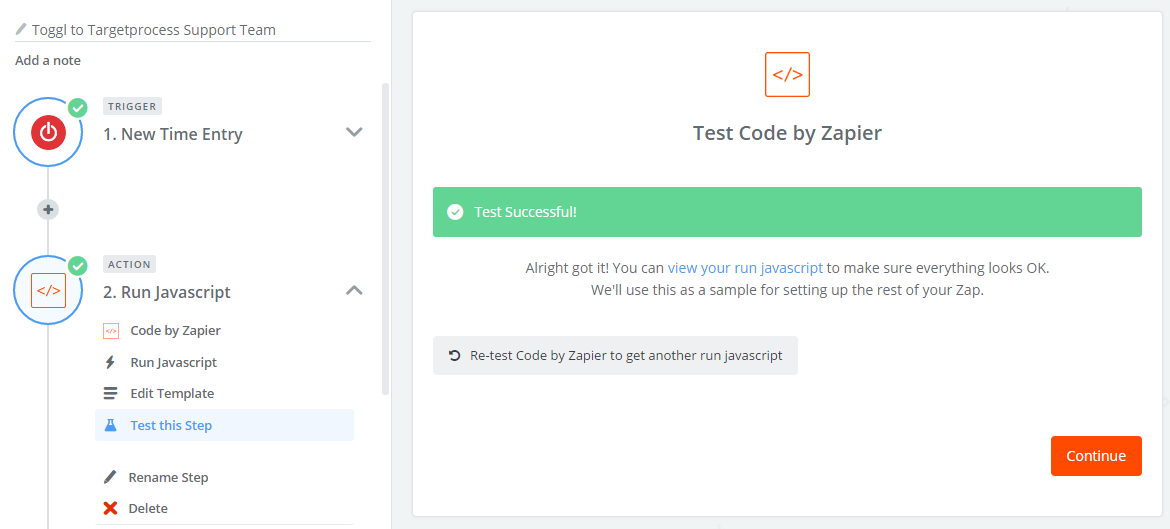
Step 5: Post time record to Targetprocess
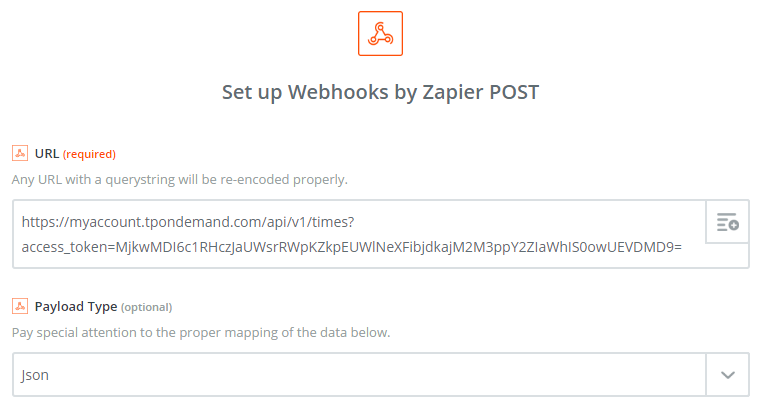
Add one more Action 'Webhook by Zapier' with POST option:
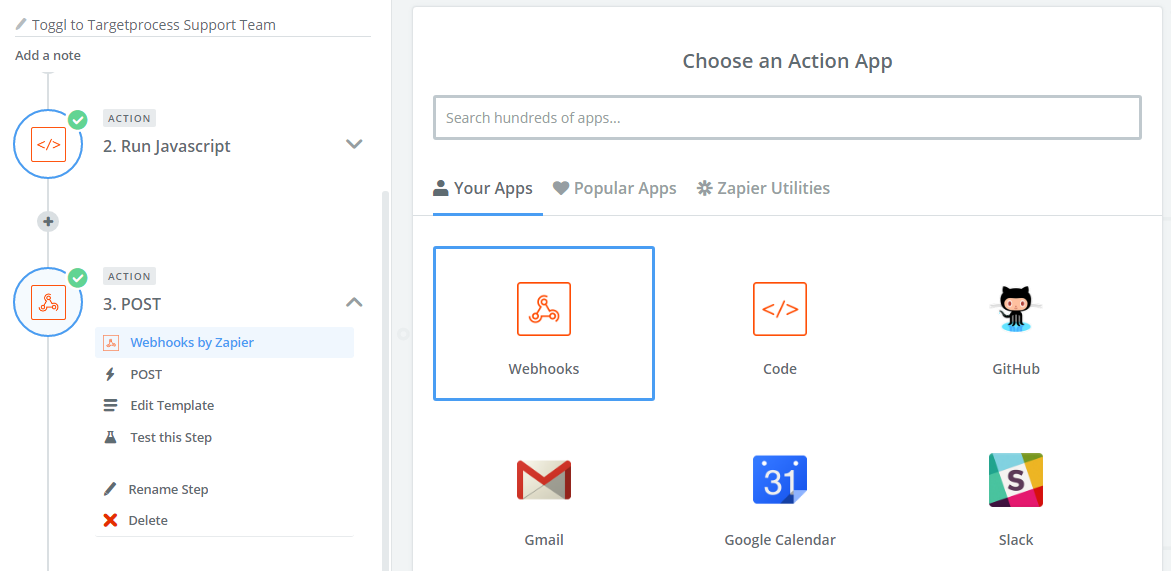
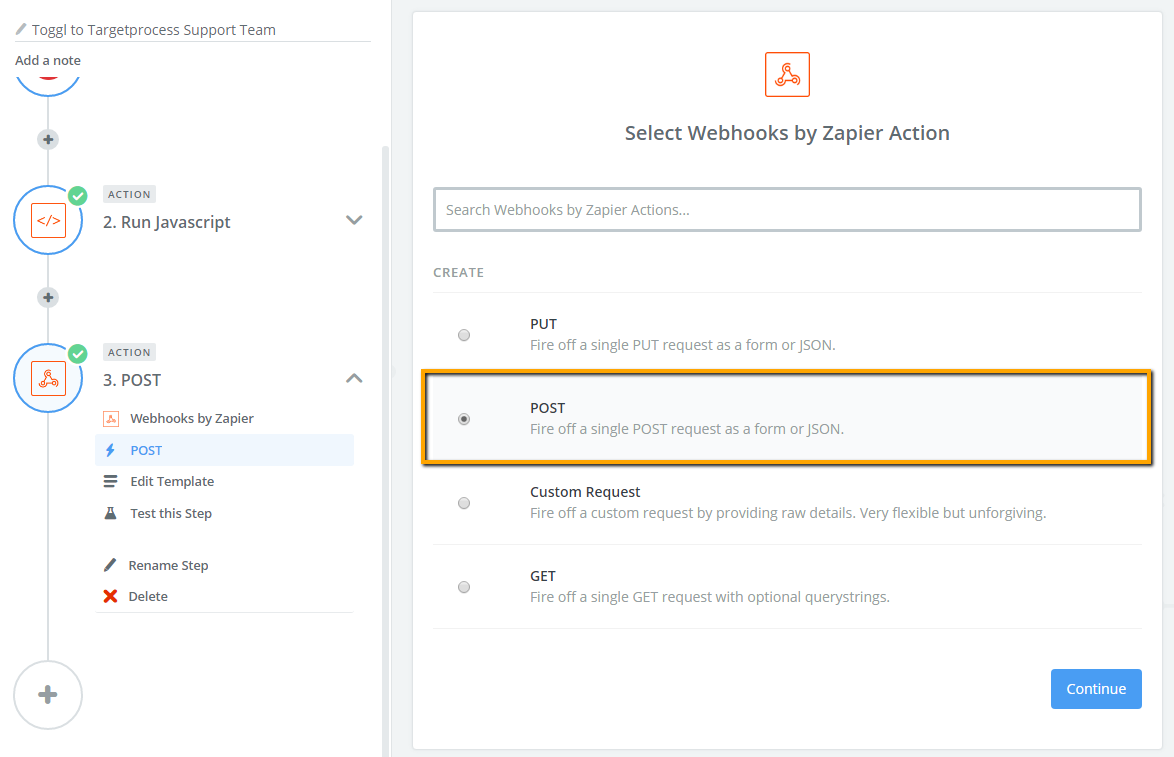
Select Webhooks by Zapier Action: POST
Edit Template:
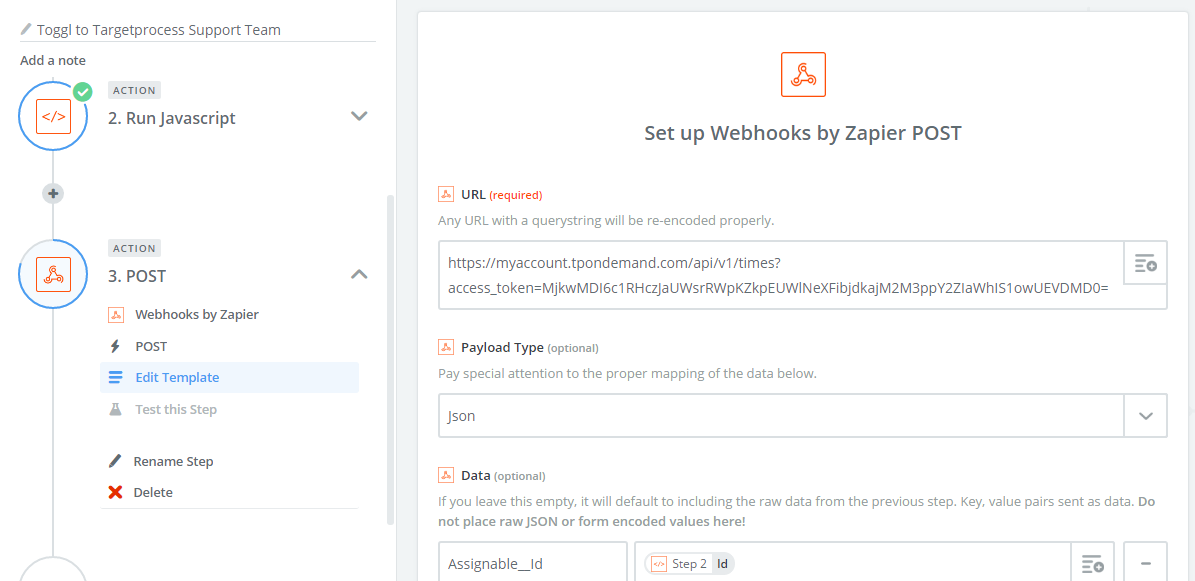
Use a template like the one below.
| URL | https://myaccount.tpondemand.com/api/v1/times?access_token=MjkwMDI6c1RHczJaUWsrRWpKZkpEUWlNeXFibjdkajM2M4ppY2ZIaWhIS0owUEVDMD9= | Replace account URL and access token with your own values. |
| Payload Type | Json | |
| Wrap Request In Array | no | |
| Unflatten | yes |
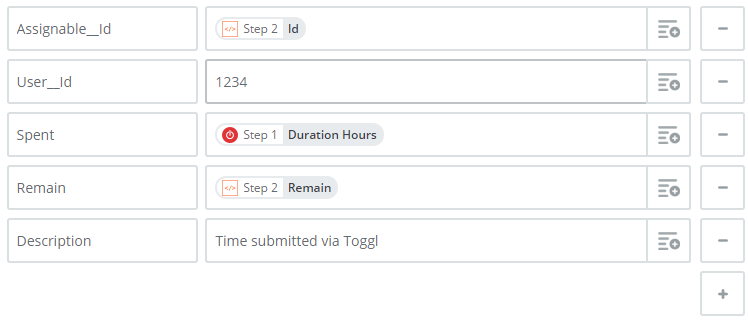
Data:
| Assignable__Id | Step 2 Id | Two underscore symbols are used. |
| User__Id | 1234 | Two underscore symbols are used. Paste your Targetprocess User ID here. |
| Spent | Step 1 Duration Hours | |
| Remain | Step 2 Remain | |
| Description | Time submitted via Toggl | Any text can be inserted here. |
To retrieve your Targetprocess User ID please make the following REST API call to Targetprocess application in your web browser:
GET /api/v1/Users/LoggedUser?include=[Id]&format=json
Example of valid output:
{"ResourceType":"User","Kind":"User","Id":1234}
Headers:
| Content-type | application/json |
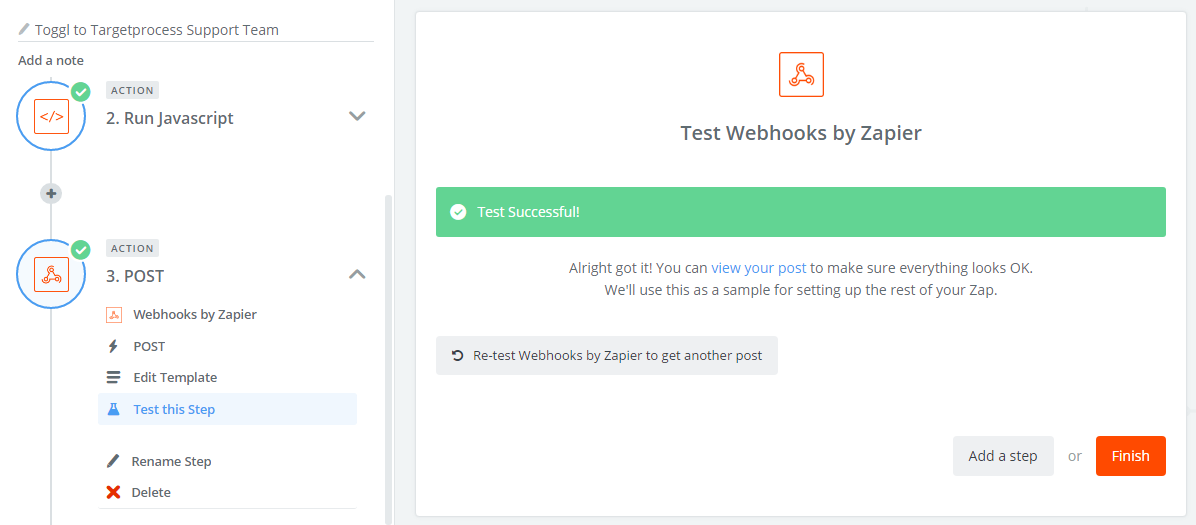
Test this step.
Turn on this Zap and enjoy automatic time posting!
Here is how Task History of Zap looks like in Zapier:

Here is how automatically submitted Time entities are displayed in Targetprocess entity details view:

Time Remain value is updated automatically when the entity you submit time to has only one Role with Effort in Assignments area. Otherwise in automatically posted Times Remain value is set to 0.
Updated about 5 years ago
