Send an email when Time Spent is added
Step 1: Set up Zapier Hook
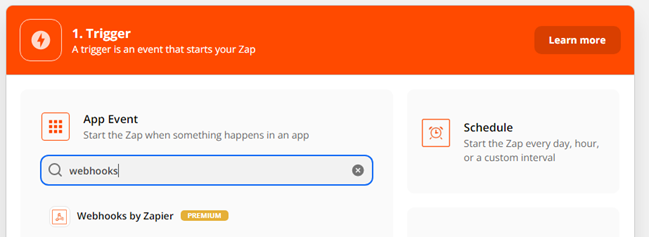
Create a new Zap. Choose a Trigger App: Webhooks
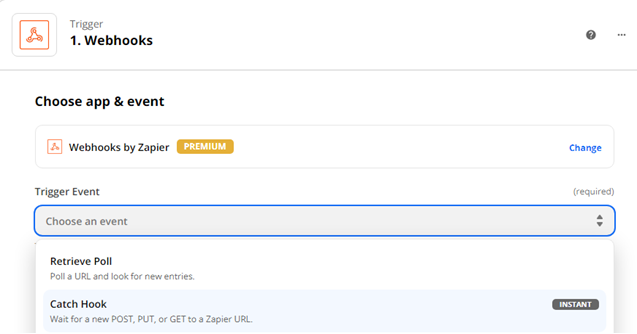
Webhooks Type: Catch Hook
Get a generated Webhook link at ‘Test this step’:
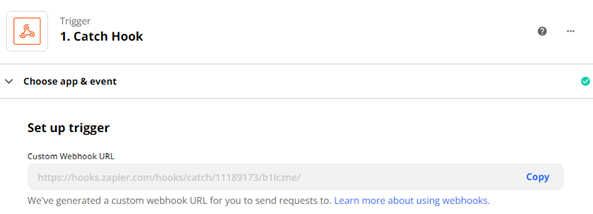
When you have it copied to your clipboard, please switch to Targetprocess but keep the browser tab with this Zapier setup open.
Step 2: Set up Webhook profile in Targetprocess
Go to Settings -> Automation Rules -> Create new rule. First you will select the conditions on which the automation rule be triggered. Click the dropdown box next to “THEN” and select “Send HTTP Request” Add the Zapier Webhook link generated in the previous step in the provided URL box. Fill in the request body according to your needs.
In our case we’d like to look for Time Spent creations or changes.
Add all the fields you’re interested in to the template and click on Save once this is completed.
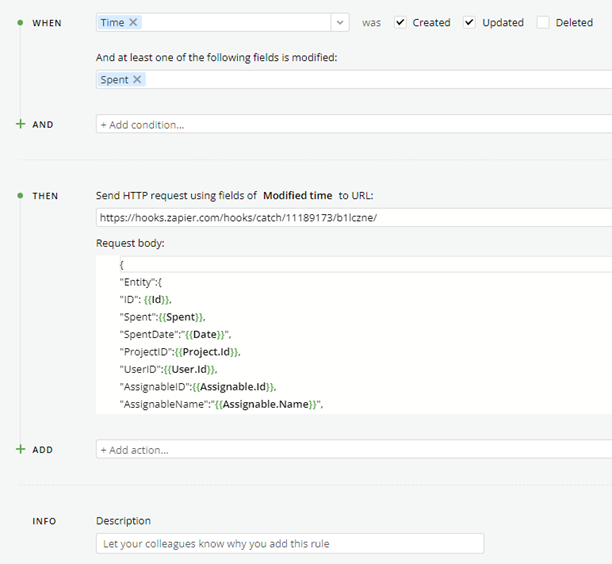
Here we’re using the following template
{
	"Entity":{
	"ID": {{Id}},
	"Spent":{{Spent}},
	"SpentDate":"{{Date}}",
	"ProjectID":{{Project.Id}},
	"UserID":{{User.Id}},
	"AssignableID":{{Assignable.Id}},
	"AssignableName":"{{Assignable.Name}}",
	"Description":"{{Description}}"
},
	"Modification":"{{Modification}}"
}
Step 3: Perform an action in Targetprocess to trigger Webhook
In order to test your Webhook-Zap you need to perform an action in Targetprocess which is set to trigger Webhook. In the example above the corresponding action is to change or create the Spent field on a Time record.
Now it's time to switch back to Zapier setup!
Step 4: Test Zapier Hook
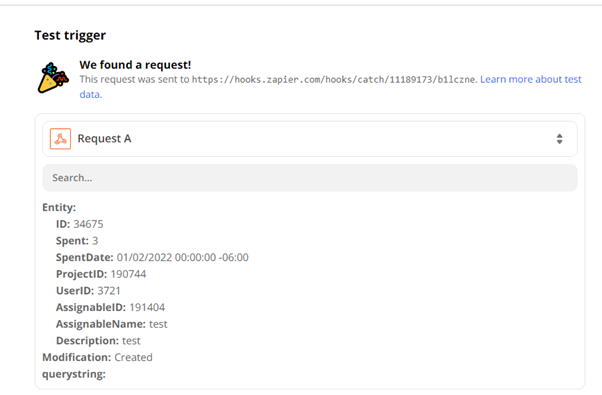
If a test is successful, you'll see all the fields which came from Targetprocess:
Step 5: Set up Zapier Action
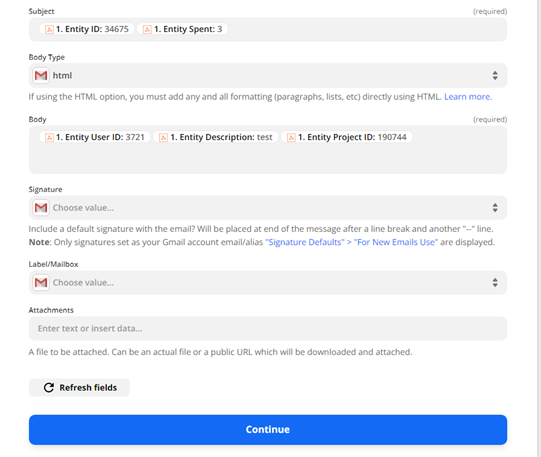
Since we want a new email to be sent, we'll choose Gmail as Action app.
In the body (or any other field of the template) you can insert all the fields which came from Targetprocess:
Save the template and turn on your Zap. Your integration is ready!
Updated over 3 years ago
