Webhooks in Targetprocess
Getting started with Webhooks
Webhook plugin is deprecated.
Please use the Automation Rules feature instead, unless you're on the old Targetprocess version (older than Targetprocess v3.13.0) or on a local On-Site installations.
Outgoing webhook plugin allows you to listen to triggers in Targetprocess entities, which will then send relevant data to external URL in real-time. Using this plugin you can create your own integrations with:
- third-party services (e.g. Slack or Zapier)
- your own service
- with Targetprocess itself
How it works
Whenever any change occurs with data in Targetprocess, it is analyzed by webhooks plugin. The plugin has list of profiles with custom filters and rules. When a change matches a filtering rule in one of the profiles of the plugin, then the plugin performs an action defined in the profile. It creates template (payload) for HTTP / HTTPS POST request and then sends it to the URL defined in the profile.
If the transmission was not succesful and returned an error, then the error is appended to the profile log. However the plugin does not perform any further modification of data in Targetprocess depending on the status of transmission.
Single data modification event may be processed by multiple webhook profiles and therefore generate posts to multiple external resources.
Sample webhook
Let's create demo webhook. When a user story or a bug is created in Targetprocess, it will post its content to Request Bin service for further inspection.
Administrator permissions are required
You have to be Administrator in Targetprocess to add new or modify existing Webhooks.
1. Creating a profile
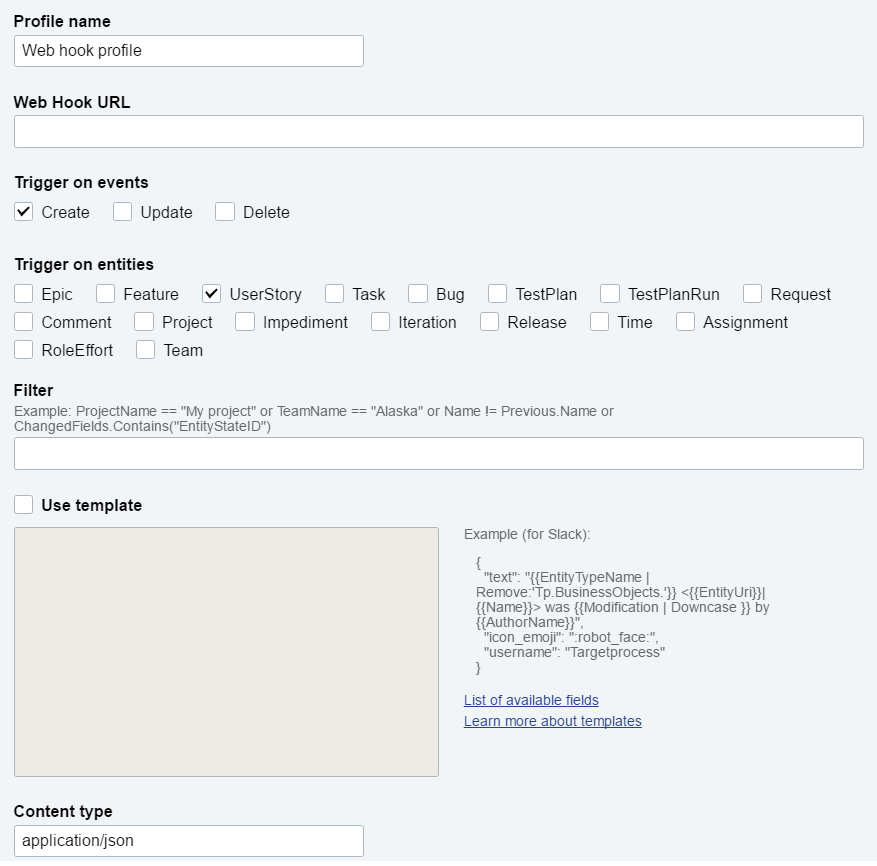
Let's go to Settings → Plugins → Web Hooks → Add Profile.
Here how a new profile looks like:

Give your profile a meaningful name, because you'll not be able to change it once the profile is saved.
Only letters and numbers are allowed in Profile name
2. Setting Webhook URL
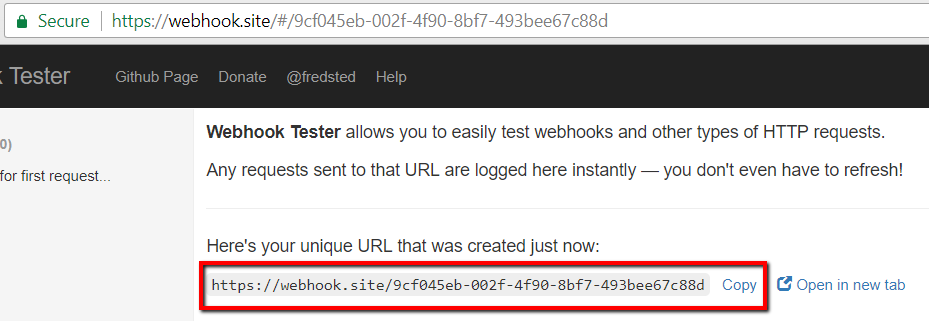
In this example we will send data to https://webhook.site/. This website creates a personal space for you where you can easily test HTTP requests.
Copy this URL which was generated for you, we will use it in our Webhook profile.

Only token authentication is supported
You cannot customize headers of HTTP request, so there is no way to use Basic Authorization.
The only option for authentication is to pass the token parameter in the URL.If your webhook makes POST request back to Targetprocess application, please learn how to obtain token or access_token parameter and insert it into URL of your webhook.
3. Tuning the trigger
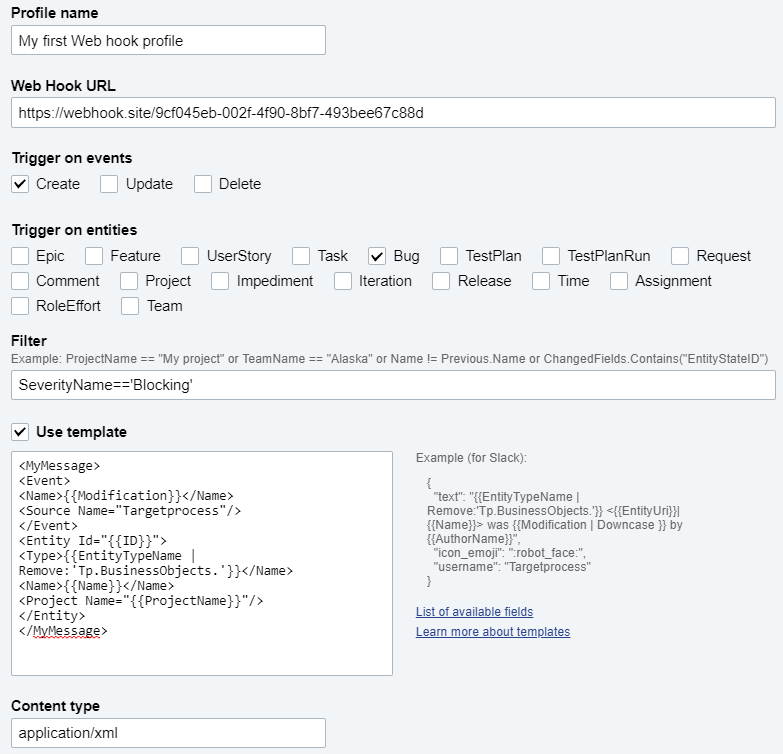
We can control when exactly our Webhook will be triggered. Let's say we're only interested in new Bugs which are added with 'Blocking' severity.
In this case our setup will be the following:
- Trigger on events 'Create'
- Trigger on entities 'Bugs'
- Filter SeverityName=='Blocking'
4. Testing the Webhook
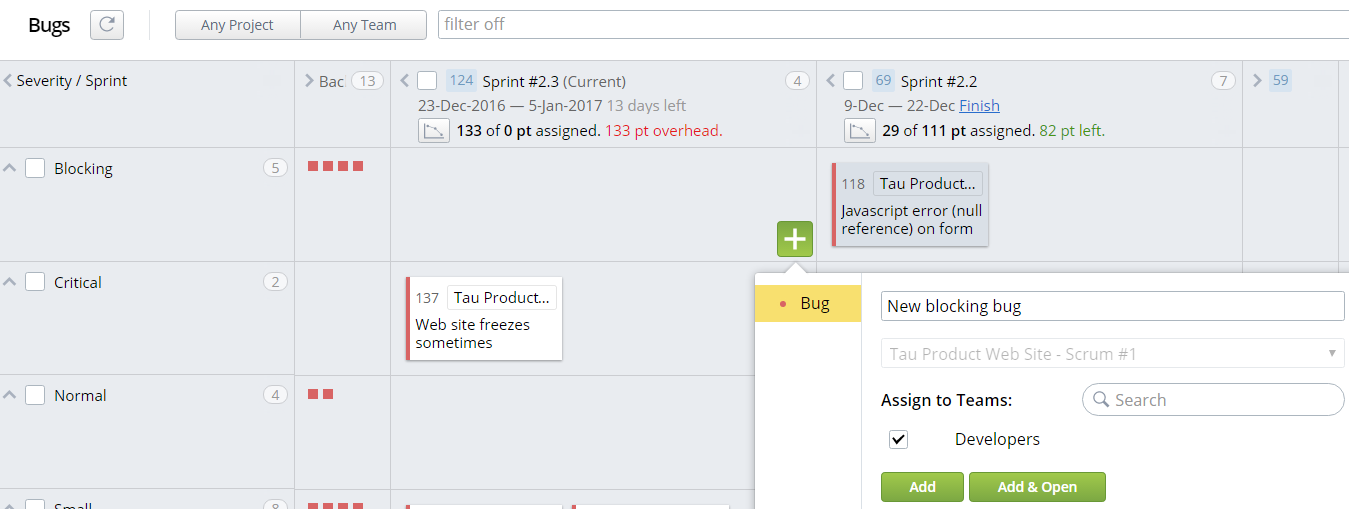
Without specifying any template we can click on 'Save and Exit' and test our first Webhook. Once the profile is saved we can go to any View and create a new Blocking bug.

Going back to the https://webhook.site/ shows us the exact data which has been send:
{
   "Entity":{
      "ID":226,
      "BugID":226,
      "Name":"New blocking bug",
      "CreateDate":"2016-12-24T08:50:25",
      "ModifyDate":"2016-12-24T08:50:25",
      "NumericPriority":206.0,
      "Effort":0.0,
      "EffortCompleted":0.0,
      "EffortToDo":0.0,
      "TimeSpent":0.0,
      "TimeRemain":0.0,
      "OwnerID":1,
      "LastEditorID":1,
      "EntityStateID":93,
      "PriorityID":7,
      "ProjectID":13,
      "SeverityID":1,
      "EntityTypeName":"Tp.BusinessObjects.Bug",
      "EntityStateName":"Open",
      "PriorityName":"Fix If Time",
      "ProjectName":"Tau Product Web Site - Scrum #1",
      "ReleaseName":"Release #2",
      "SeverityName":"Blocking",
      "EntityTypeID":8,
      "SquadID":193,
      "SquadName":"Developers",
      "CustomFieldsMetaInfo":[
      ],
      "Progress":0.0,
      "ResponsibleSquadID":11,
      "LastStateChangeDate":"2016-12-24T08:50:25",
      "IterationID":124,
      "ReleaseID":58,
      "IterationName":"Sprint #2.3"
   },
   "OldEntity":{
   },
   "ChangedFields":[
   ],
   "Author":{
      "ID":1,
      "UserID":1,
      "FirstName":"Main",
      "LastName":"Admin",
      "ModifyDate":"2016-12-24T06:16:14",
      "IsAdministrator":true
   },
   "Modification":"Created"
}
5. Adding a template
Since in real life you will post to a real URL instead of a request bin, you are likely to need to form the output in a some specific format.
Let's say you need to save XML with several fields from Targetprocess and several predefined fields. To set it up we need to go back to Webhook plugin, select the checkbox 'Use template' and type our template below:
<MyMessage>
<Event>
<Name>{{Modification}}</Name>
<Source Name="Targetprocess"/>
</Event>
<Entity Id="{{ID}}">
<Type>{{EntityTypeName | Remove:'Tp.BusinessObjects.'}}</Name>
<Name>{{Name}}</Name>
<Project Name="{{ProjectName}}"/>
</Entity>
</MyMessage>
For this case we also need to change content type to application/xml
After adding yet another Bug with 'Blocking' severity we can go back to the https://webhook.site/ to check how our POST looked like
<MyMessage>
<Event>
<Name>Created</Name>
<Source Name="Targetprocess"/>
</Event>
<Entity Id="228">
<Type>Bug</Name>
<Name>Another blocking bug</Name>
<Project Name="Tau Product Web Site - Scrum #1"/>
</Entity>
</MyMessage>
This is how the final profile looks like:

Updated 4 months ago
